Python is a relatively new language, created by the Dutch programmer Guido Van Rossum in 1991. It was a profound deviation from the languages at the time due to a design philosophy of emphasizing readability over strict formality. The oft-touted design motto of Python is for there to be one, and only one, obvious way to do something.
For those of you with a Mac, Python comes pre-installed. However, Python exists in two versions - version 2 and version 3, with fairly significant changes in the languages between these. We will be installing Python version 3.
The method of installation we have chosen is to use a software called “Anaconda”. Anaconda allows us to give you a special configuration file, which will then allow you to run a specific version of Python that will work out of the box. This ensures that everyone in the class runs the exact same version of Python.
This principle of ensuring the same software is used across the board is common practice at all big software engineering companies as it immediately eliminates a common cause of software bugs: different programmers having differing versions and configurations of their development software.
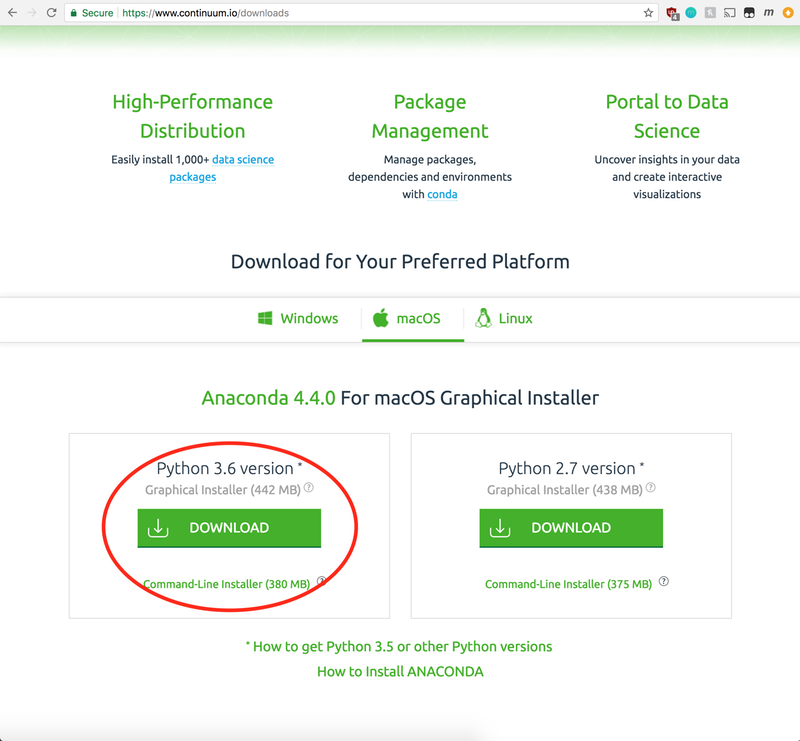
The first step is to download the installer from Anaconda Download. Make sure you get the correct one!
The installer is somewhat large, so we suggest you do this when you have a good internet connection.
The next step is to simply double-click on the “.pkg” (on a Mac) or “.exe” (on Windows) file to start the installation, and click “Continue” through the steps (there is no need to change anything).
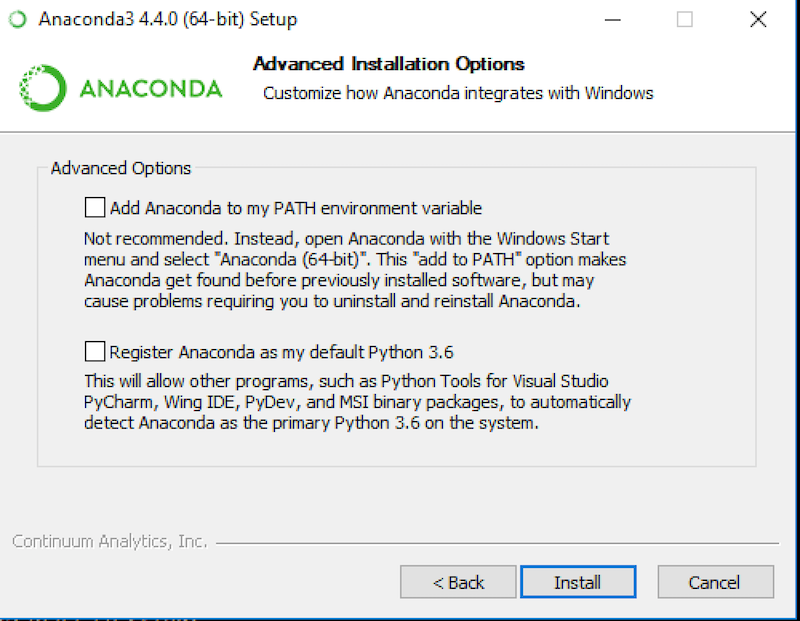
For Windows users, at the following step in the installation we recommend leaving both options blank.
(At this point, you should find you have a new icon installed in your Applications folder (on macOS) or your Start Menu (on Windows) called “Anaconda-Navigator”. This is a useful GUI interface for Anaconda, but we will stick to using the command line, so for now ignore this application.)
Now that you have Anaconda installed (the general program for managing Python programming environments), you need to customize it for the specific Python environment we’ll use in this course.
Make a new folder on your computer. Call it “FMS”. This will be where you keep all the code you write in this course. (Trust us: you don’t want to make it hard on yourself by scattering files all over your computer.)
Next, right click on the appropriate link, select “Save Link As”, and __save it into your FMS folder:
This is the magic file that tells Anaconda exactly how to configure a Python environment for the course. Python will work even if you don’t get this file working – but you will be using different versions of the software, which may lead to subtle and maddening inconsistencies.
Now you will need to use a command line window.
The command line allows you to launch and run programs by typing their names, rather than clicking on them. Doing it this way allows you to run programs in a variety of ways that give you precise control over how they launch. In particular, you can make sure that your Python programs will work with the version of Python that Anaconda provides.
On a Mac, the command line is a program that’s already installed “Terminal” (located in the Utilities folder inside your Applications folder).
On Windows, it is usually a program called “Command Prompt” – but Anaconda has just installed a custom version of Command Prompt called “Anaconda Prompt” which automatically sets up your Anaconda environment.
Now, we want to open up a command line window in the FMS folder you just created.
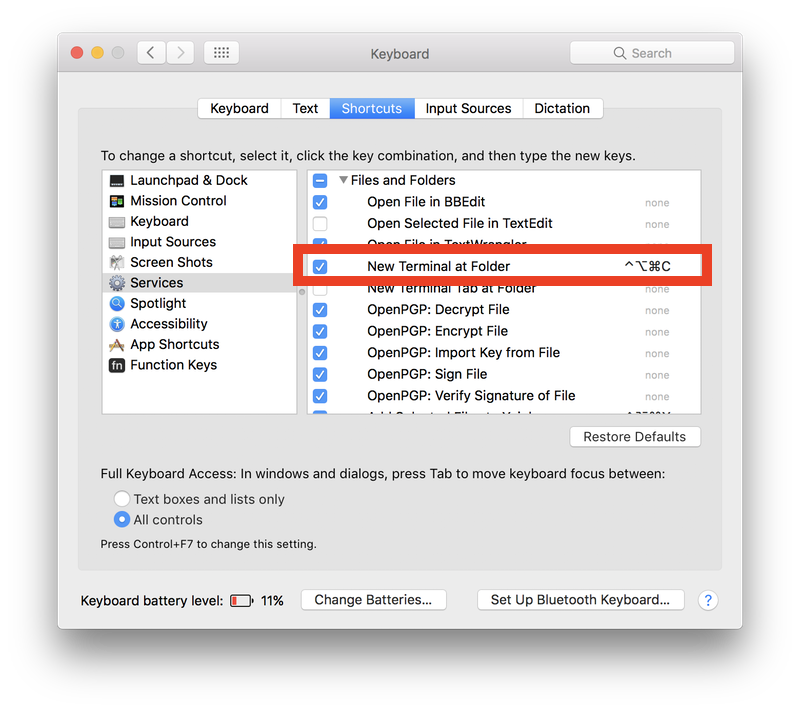
On macOS, you need to enable this feature first. Open System Preferences, then go to Keyboard Shortcuts. Select “Services” in the left menu, then scroll down to the “Files and Folder” section on the right menu. Click “New Terminal at Folder” so that it’s selected. (You can also create a keyboard shortcut since you’ll be using this command a lot, e.g. command-option-control-C.) Once you have turned on this feature, you can open a command line window from any Finder window by going to the menu bar and selecting Finder > Services > New Terminal at Folder. (On macOS, you can also open a Terminal window, type “cd “, drag a Finder folder into the Terminal window, and hit return.)
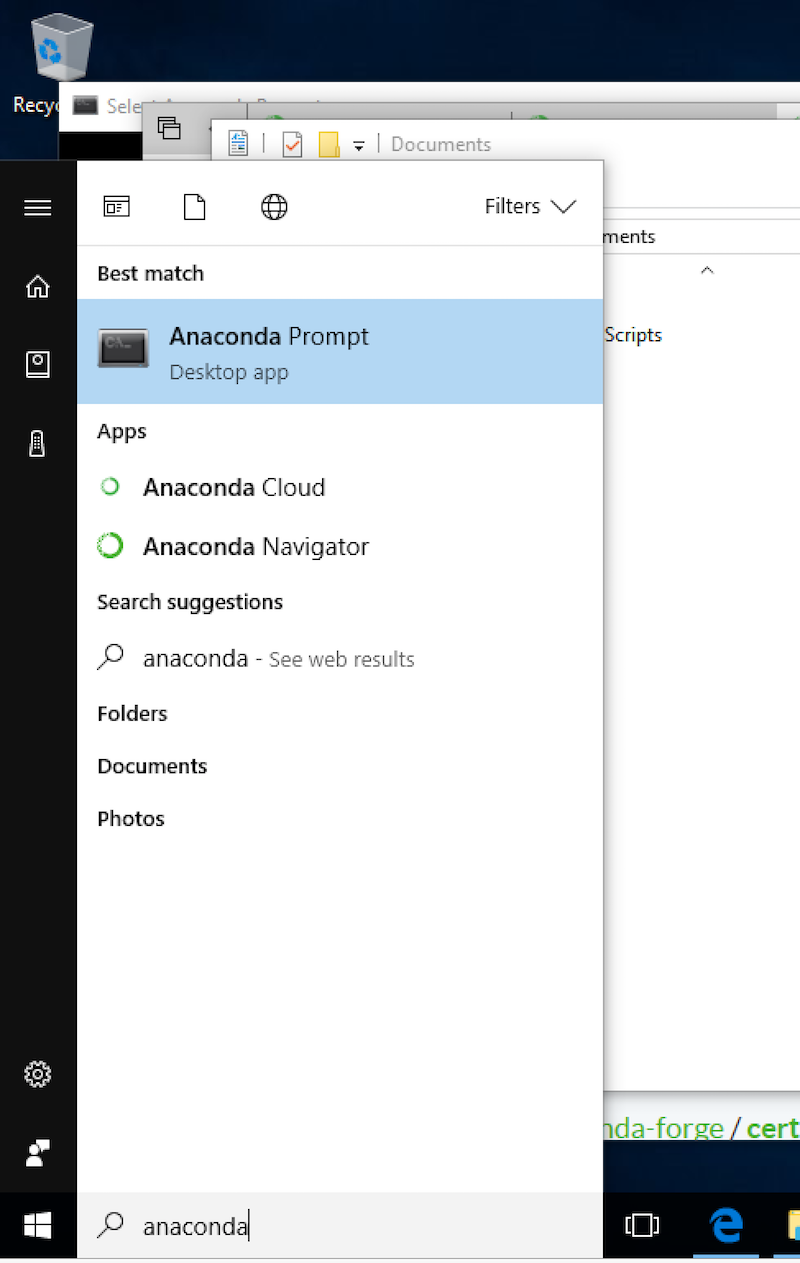
On Windows, click the start menu and find/type “Anaconda Prompt”. This should open a new command line window with access to all the Anaconda commands.
To switch to the FMS folder, type “cd “, then drag and drop the FMS folder from Explorer to the open prompt.
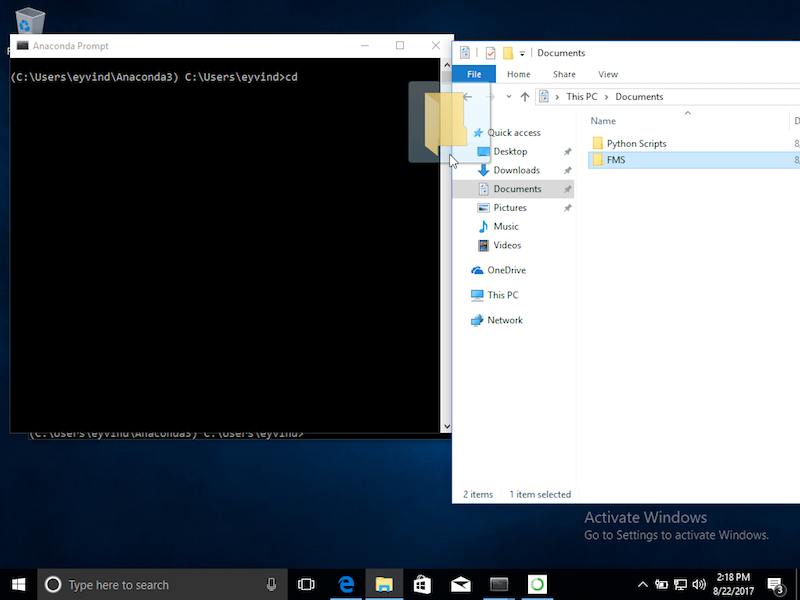
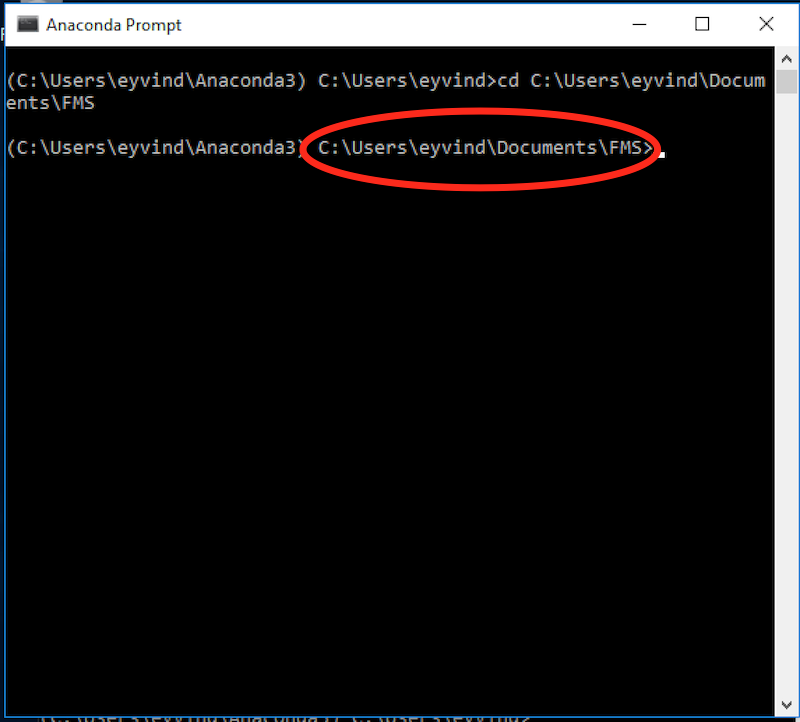
Press Enter, and your command prompt should show a new line reflecting that you are now in the correct folder!
Once you are in the folder in the command line, type ls (on macOS) or dir (on Windows) to verify that the “.yml” file is present.
Now, on Mac type:
$ conda env create -f FMS.yml
On Windows type
> conda env create -f FMSW.yml
To verify the installation worked correctly, type:
$ conda env list
You should see FMS in the resulting list.
IMPORTANT: You must carry out the following steps EVERY TIME you open a new terminal window in which you plan to work on Python code.
Now, we will “activate” the environment, i.e. tell Anaconda that you want to work on Python with the FMS settings. On macOS, type:
$ source activate FMS
On Windows, type
> activate FMS
Now, you should see (FMS) at the start of every command line “prompt” (so-called because it is “prompting” you to type a command). This indicates that you are “inside” the environment and any commands you execute will be executed using the python version provided by the environment.
Make sure everything worked correctly by typing:
$ python
You should see something like the following. (the exact details will vary. But the Python version (the number right after Python in the first line) should start with “3” and the last line should be >>> followed by a space and a cursor for you to type.
Python 3.6.2 |Continuum Analytics, Inc.| (default, Jul 20 2017, 13:14:59)
[GCC 4.2.1 Compatible Apple LLVM 6.0 (clang-600.0.57)] on darwin
Type "help", "copyright", "credits" or "license" for more information.
>>>
Now make sure that Python really works by typing:
>>> 2+2
You should see:
>>> 2+2
4
>>>
If you do, great! Python has just added 2 and 2 for you and correctly concluded that they add up to 4. Now it is waiting for your next command. Soon you will have plenty. But for now, quit by typing:
>>> quit()